So happy to be sharing some progress on our new home! The home we’ve been living in since last Friday! Can I get an AMEN?!?!

All our stuff came in to town on Sunday the 24th and we took the week to try to unpack as much as we could before officially retiring the extended stay hotel and moving everyone into our new home. It’s been quiet here on the blog, Instagram and Facebook because I’ve been buried in boxes and boxes and boxes! My good friend, Kathryn, came over to help and my mother in law has been here helping a ton too! I also hired an local organizer for the day and it was super helpful to have an extra set of very efficient hands helping to unload boxes, move furniture and put away belongings. I have helped clients in the past on moving day to decide where furniture and art should be placed and it was nice to have someone helping me unpack!

Right after we closed on our house at the end of May, we got to work. I had an idea of what I wanted for this house and I was able to pick the main finishes pretty quickly. We have used most of the paint colors we used in our last house, with the exception of the boys’ room. The colors all work well together and we loved them in our last house. I’ll be sure to share those as I share each room individually.
I wanted a wide plank floor in a medium true brown {without red or yellow undertones} with a distressed finish since I knew it wouldn’t be long until they got a bit of “love” from our crazy crew. We had narrowed it down to two colors that were very similar. Our wood floor installer was great and when he saw our options, he recommended one over the other because of the core. We ended up going with Anderson Bernina Maple in Costello, which is an engineered wood. We replaced almost every room on the main floor and upstairs with hardwood floors, and we love how they turned out!
Please excuse the photo quality. Every one of these photos is with my iPhone.

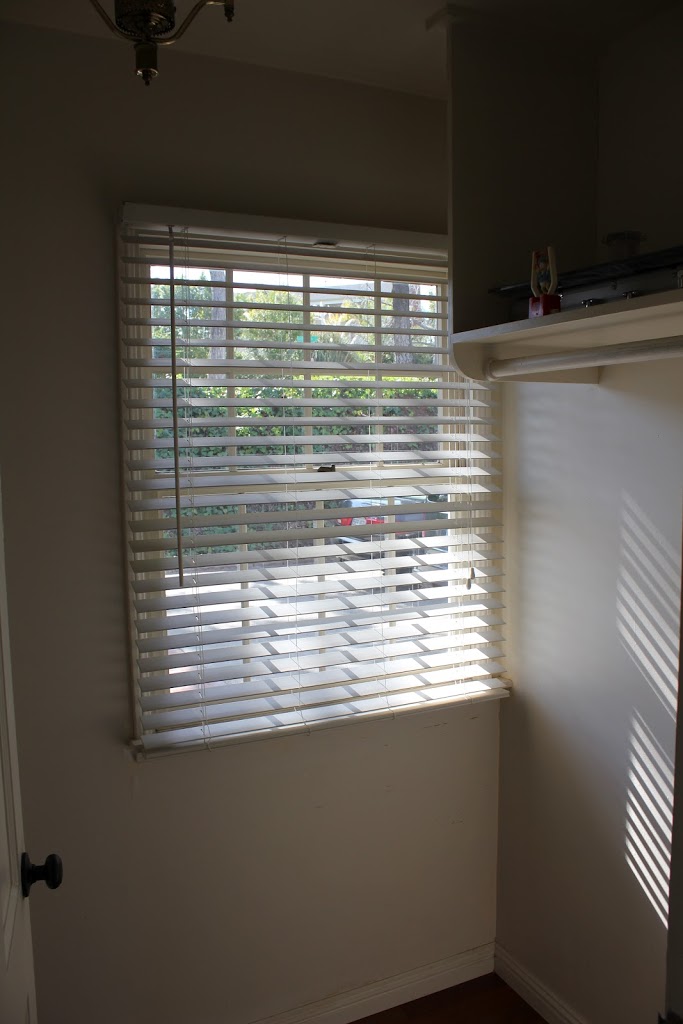
This bedroom had carpet that matched the wall color and a wallpaper border where the ceiling met the walls. The carpet was ripped out, the wallpaper boarder removed and it was ready for my dad to work his painting magic and get a fresh coat. In the overall reno budget, we cut out a few rooms I knew I could paint, {with the help of my dad! Thanks dad ;)} even if it would take 3 times as long. It saved us quite a bit of money. My dad was able to finish the office and the boys’ room before floors went in, but I’ll have to paint the walls and trim of our master bedroom once school starts.

Here’s the same room, with a fresh coat of primer.

The built-in wall was one I wanted to work on first, and they got to work demoing it right away. We also opened up that small little door way to the right of the built in wall.
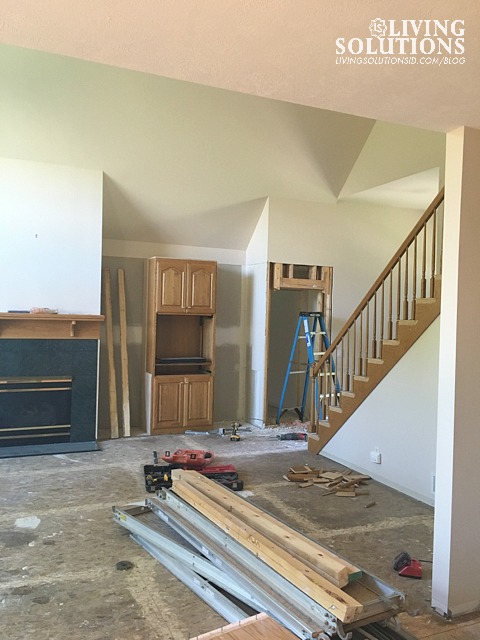
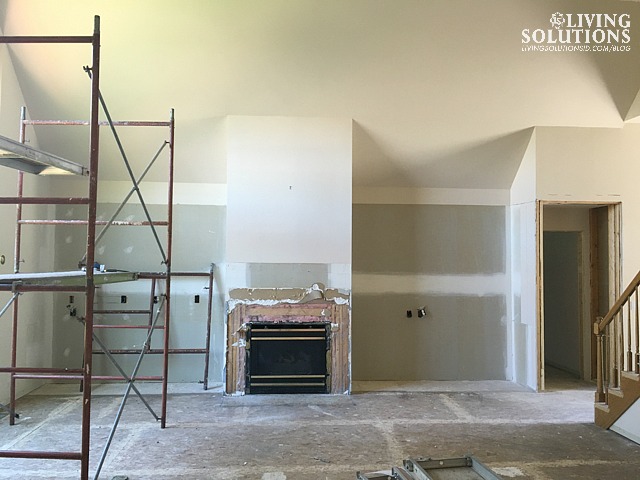
All cleared and framed out!

I had sketched out the fireplace {and this whole built-in wall that I’ll share at some point} and our carpenters built it on site. I had a vision in my head about how I wanted the fireplace surround to wrap around the fireplace wall and not just look like it was “stuck” on the front. After talking, sketching and physically showing our trim guys my vision, we came up with this…
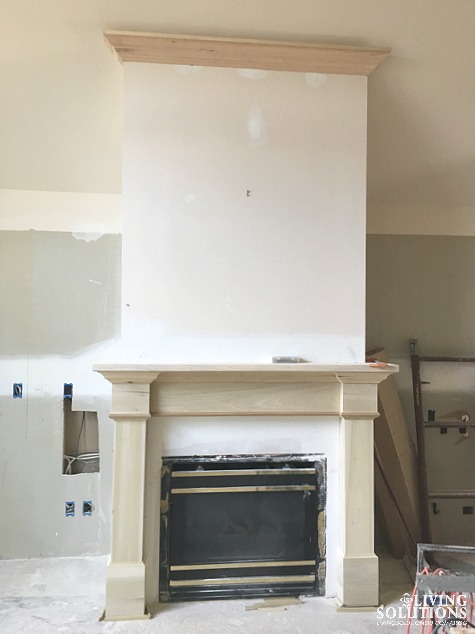
I love how it turned out. As of right now, I’ll be trying out some of the heat-resistant spray paint on the brass before I go to see if these trim pieces can be replaced. We now have a gray stacked slate stone around the fireplace that I will be sharing soon, too! Lots to share :)

Moving in to our master bedroom, there was more wallpaper. A pretty little border and a ceiling covered in flowers. This house was lacking character and after coming from a house that had a ton of character, I wanted to add more unique details. This ceiling with the soffit was begging me to make it more interesting! ;) I’m pretty sure I heard it call out “Gina, please plank me and add as much molding as you can!” So of course I had to listen. This room got more character and no one had to waste a minute of their life taking down this wallpaper on the ceiling. A win-win if you ask me!
We were going to take out the soffit but there was too much hiding in there so we kept it and I’m glad we did because I think it adds to the dimension of this room. The patched mauve walls are now obviously in need of a fresh coat of paint! I don’t have a good picture of the ceiling but I will soon!

We wanted to change out the molding throughout and with the new floors, we decided to go with new doors, too. It’s all a domino effect. My little design assistant’s arm is in there helping to show which doors we picked. I like that they are a bit more modern than the 6 panel that we had, and a change from the 6 panel we had at our old house.


The staircase got an overhaul. Higher railings, new posts and the rails, risers and treads were all re-done.


Our office had green carpet and red wallpaper. With the lighter paint and new floors it feels so much bigger! But you would never know as of right now since that is the only room that hasn’t been unpacked at all. Boxes for days in here!

We still have quite a bit to do to breathe new life into this house and make it our own. All the bathrooms need updating and our kitchen will need to be updated as well at some point. We better start saving! One side of the great room is all done and you turn around and see a nice, but pretty out-dated kitchen and you can clearly tell what has been re-done and what hasn’t! But we will get to it over time and continue to make this house a home for our family. We are already loving how comfortable it is and how it’s feeling like home with each box that is unpacked.
I’m excited to take each space and share more of the updates as they happen around here. But for the time being, I’m trying to focus on this last week or so of summer left with my kids and make them feel comfortable and secure before we start up a new school year at a new school. Have a great weekend friends!
You can read about our new house here and why we moved to the Midwest here.
Come find me on Pinterest // Facebook // Instagram // Twitter I would love to connect with you!


It’s looking SO good Gina! I’m having so much fun catching upon your blog tonight! :) xo