It’s been a busy, exhausting week so we haven’t posted as much as we’d like. I thought I’d catch up on this rainy, cold afternoon on a project I tackled last weekend.
I finally got one of the last projects in our home office checked off our list last weekend: Hanging diplomas, achievements, etc. up on the walls! My husband works from home most days, and the office is where I do Living Solutions work, so it’s an important room that we spend a lot of time in. I talked about working on our office closet here, and really the only other big project left in here (besides getting closet doors) was getting stuff on the walls.
I found some wall space by my hubby’s desk for his diplomas, and I’m hanging my diploma over my desk. That left all of his Navy memorabilia. We had one wall left for what’s affectionately known in the Navy as the “I love me” wall. Yup. That’s what they call it.
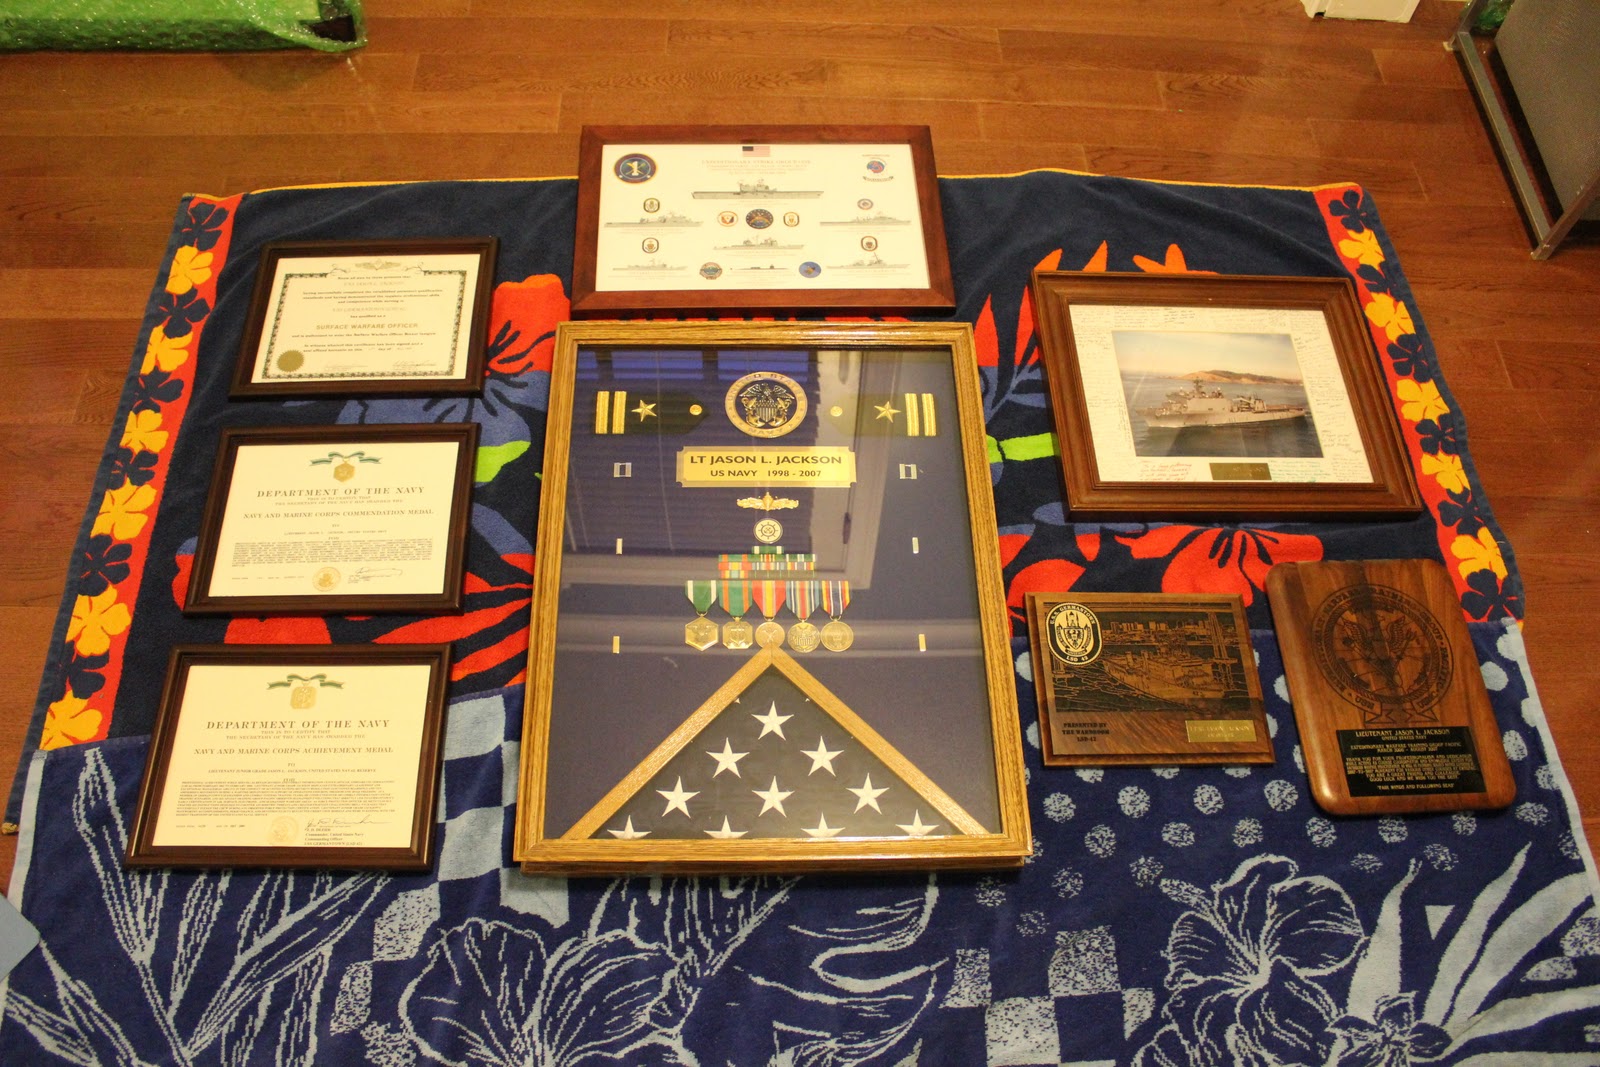
I started the gallery wall hanging project by first laying out everything we had that we wanted to end up in the collage on the floor to get an idea of the layout.
It started like this.


I played around with a few different layouts until we ended up with an arrangement we both liked. We both wanted to keep all the Navy pieces together. A few of the pieces had black frames and while putting everything together, I saw that all the larger pieces that we couldn’t change were in a wood frame of some sort. So I decided to keep that theme of a wood frame going throughout the room to give it more uniformity. I was able to switch out one of the frames for another one we had around the house. I had to purchase just one frame for a larger piece, and 3 for the smaller ones, but I had a 50% off coupon from Michael’s so it didn’t make it so bad!
This is the layout we finally landed on.
This layout ended up being more symmetrical because of the pieces I was incorporating. If you don’t have as many “like” sizes of frames, this could easily be adapted into more of an asymmetrical arrangement.
I got all tools I would need.

I started with the largest piece in the grouping in the center and measured off that one piece. I had laid everything out on the floor pretty much with the same spacing that I wanted to use on the wall. I measured from the crown molding down, as well as from side to side to make sure it was centered. My husband also has his sword that will go up at the very top on a small ledge so I had to leave room for that as well.
It is important to measure, measure, measure when you’re doing a symmetrical gallery wall. However, you can get away with not doing too much measuring if you are doing more of an asymmetrical arrangement.

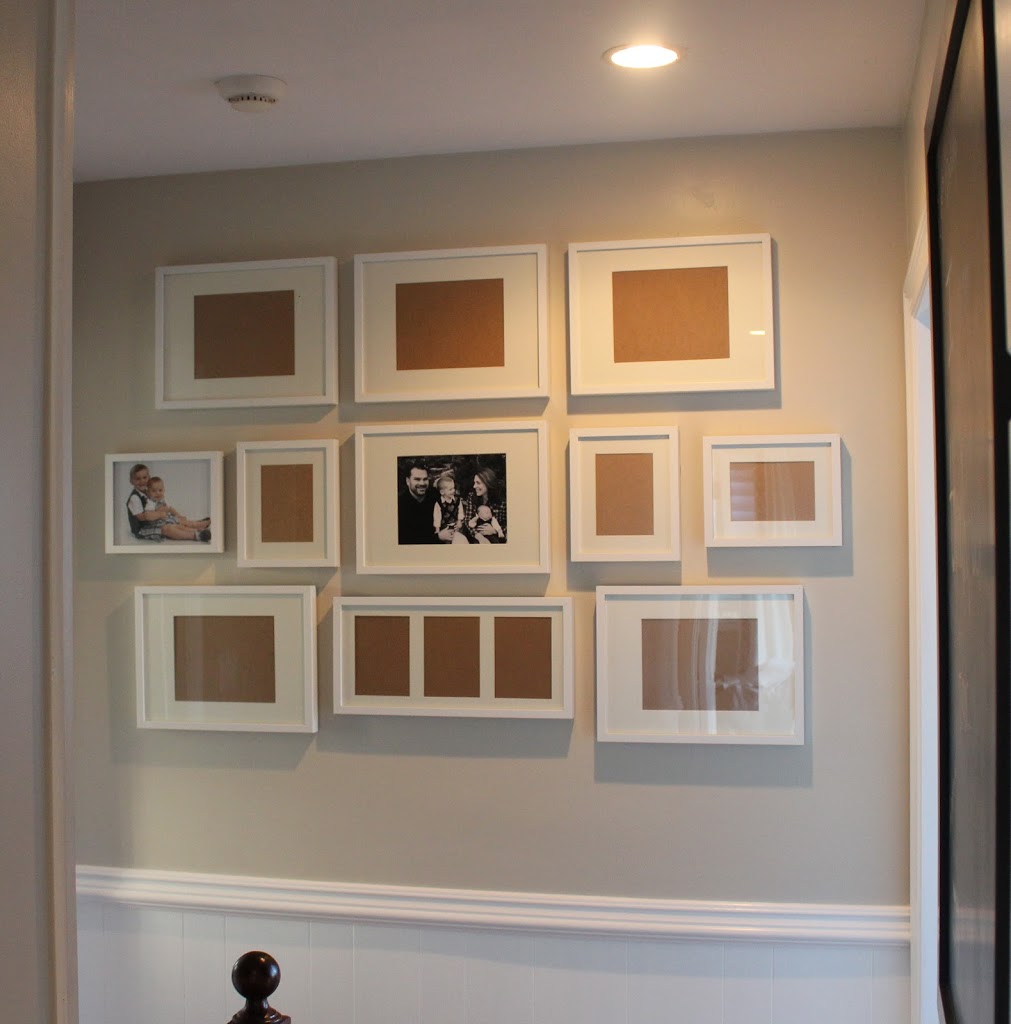
I made sure all my pieces were lined up vertically (except for the right side, which you can see in the picture of the final layout below). But it always looks more visually appealing if you off-set your pieces when looking at the horizontal plane. Typically you would only line up the pieces horizontally in a straight line if you were doing a series of similar photographs or pieces, like in one straight horizontal line or if you had a grouping of 4 or 6 or say 9 pieces that all went together and were lined up in a series like this….

or like this…

If you have pieces that are all part of the same series and are the same size, lining them up works well. If you have different pictures, pieces, etc. that are all different sizes, a collage works better.
So here it is.
In all it’s “I love me” glory.
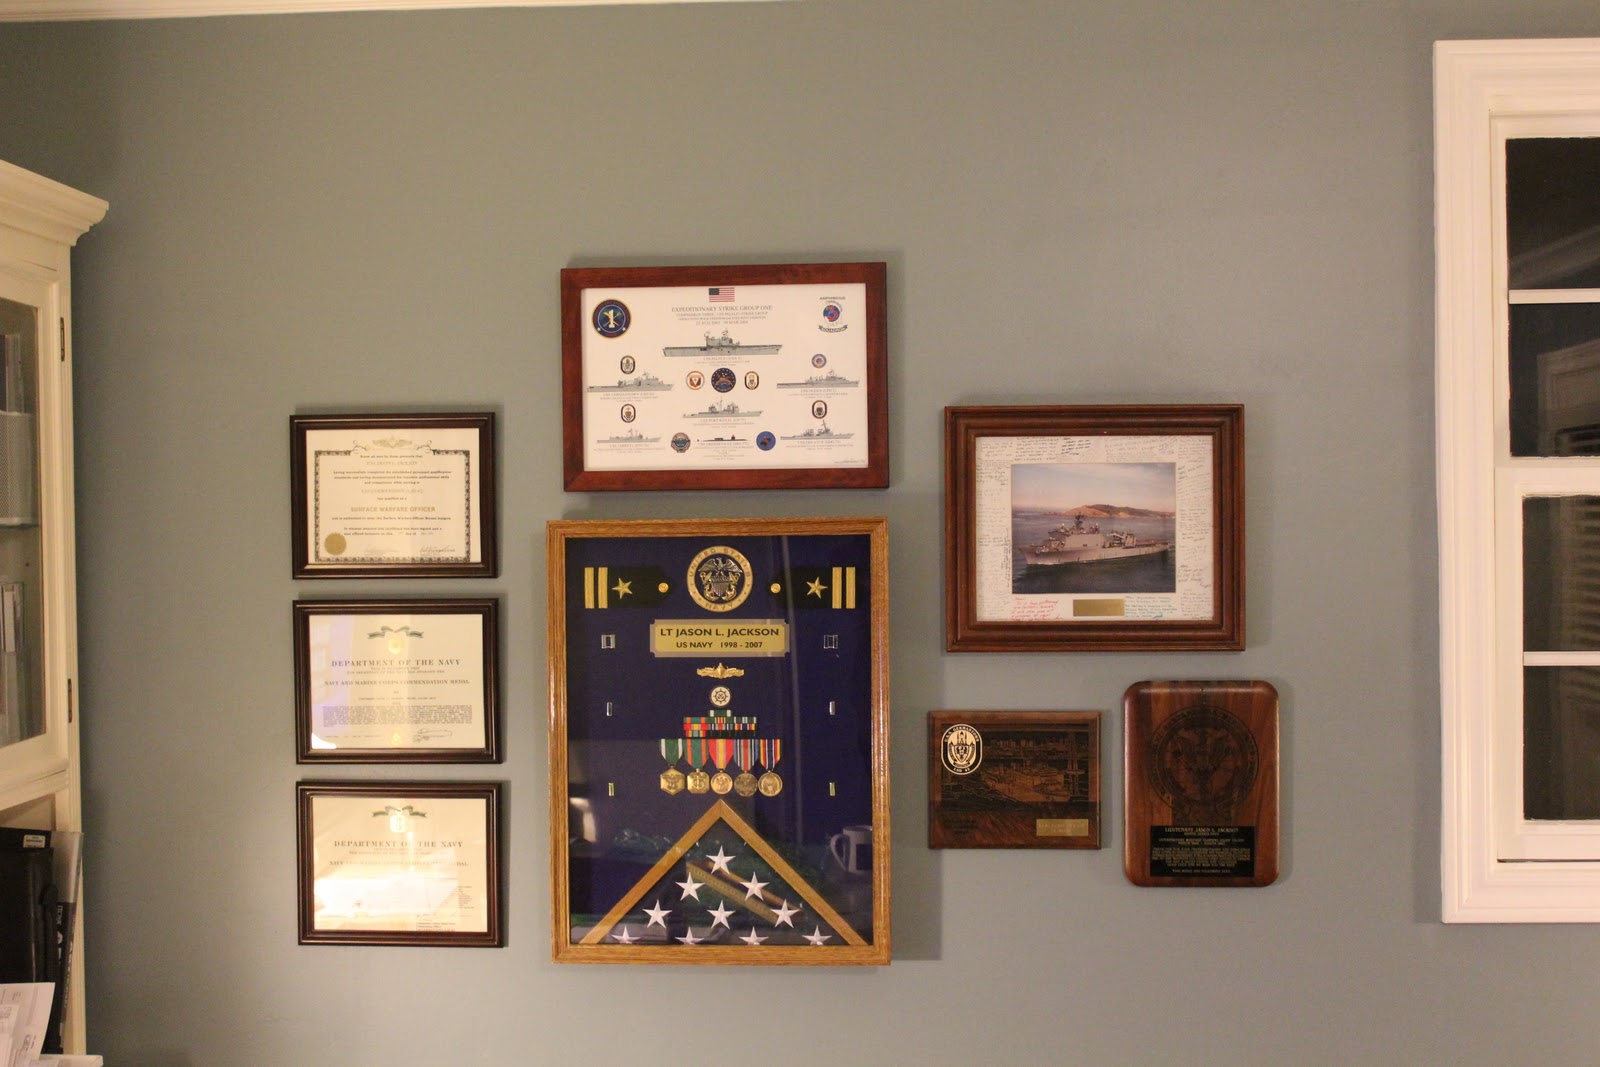
{I’ll post an updated picture when we finally get the sword up there!}
So to recap:
- gather pieces together
- use similar frames to give uniformity (unless it is more of an eclectic layout)
- measure, measure, measure
- use a more structured, lined up grouping for a series of things that are the same exact size and the same content
- use more of a collage grouping for pieces that are different sizes and of different content
I’m planning on eventually doing some family photo gallery walls in our upstairs hallway and an inspirational gallery wall that I wrote about here in our downstairs hallway. So when I {finally} get to that, I’ll definitely post about how I ended up approaching that project.
Have any of you attempted a gallery wall? How did it turn out? What layout did you use? I would love to hear!!!


Leave a Reply