Hi friends! I’ve been busy with projects around here, but I’m not sure you would really know that if you stopped by! I don’t know about home projects around your home, but over here, many projects seem to take forever. So goes the painting of our master bedroom. I’m not really sure what I was thinking when last year, I thought, “I’ll have a lot of extra time on my hands. With 2 kids in full time school, and not having a whole lot of commitments, I’ll totally have time to work on our house.” Um, no. Guess I forgot what it was like to have a baby. I finally have all the walls painted and just need to finish up on the last of the baseboard painting. Then comes the fun part! Hanging art, figuring out accessories and accents, finalizing the window treatment details, seeing how it is all looking with the paint finished, etc. However, it will be awhile until this whole room is fully complete. I find that having a design plan helps whether you can implement the project all at once, or if you need to phase the project out to pick pieces and complete the project over time.
Just to re-cap on my last post about our master bedroom, I shared the first steps in my design process when working on a full room update. You can read about the initial design process here. I sketched in some ideas and more or less came up with the first stages of ideas for the overall plan.

The next step in my design process is gathering ideas and pieces together to see how it all looks related to each other. For certain pieces, I’ll pick a few options for the client {or me!} to pick which they prefer, and for other pieces, there’s really only one right choice that would work. In between painting and painting and painting, I pulled together a quick mood board with some ideas and inspiration for the look I would like in our master.

I was going back and forth with a few color options for the walls, but decided to pull the trigger on Benjamin Moore Revere Pewter. It’s one of my favorite go-to warm grays. I used it in our powder bathroom update in our last home and it’s the paint color in our office in our new home. The sample on the mood board doesn’t really look like it does in reality on the walls. It’s a bit more gray on the wall, at least in our home.
I mentioned how I wanted some mirrors that had the feel of windows on either side of the bed and I found these affordable Powell Wall Mirrors from Home Decorators. I love the arch on top since everything in this room is very rectangular.
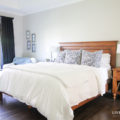
Our master bedroom furniture was purchased for our home and the wall our bed went on wasn’t very long, so I had to get a smaller nightstand on one side. Eventually I would like to either get another of the same larger nightstand or something a bit different, but similar in size. The small nightstand on the right you can see in the picture of our last master on the mood board is just too dinky for the size of the wall it is on now, so that’s on my list to update eventually. The Powell mirror hanging over it will overpower it and make it seem even smaller.
For art, I loved this April Showers framed print at Pottery Barn, but I think it may be too small. It’s the abstract landscape on the mood board. We’ll see once I get everything back in its place and measure it out. I just love the colors and the feeling. We don’t have a lot of abstract art in our house, if any, and I would love to incorporate some of it in our master. I would also love to do a grid of photographs on one wall, like this…
 source
I even like the gold frames, but I’ll probably end up going with more of a bronze finish for the frames. I’m thinking family photos, maybe some of Jason and I and some from trips we’ve taken.
And I’m still on the fence about what should go over the bed. I think I’ll want something because it’s a big open space, but we’ll see. In California, you just don’t typically put anything over the bed. I’ve lived through too many earthquakes to know I don’t want something falling on me or anyone I love in the middle of the night! But here, it’s a different story. I’d rather have the mirrors on each side and the grid of photographs, so we’ll see if it’s too much to also add something over the bed. But if I do, I like the idea of these Framed Blue Textile Art pieces. If it’s next to photographs, I don’t want it to be a specific painting, but more of a complimentary art piece. I love the idea of an upholstered bench and a big, beautiful, more traditional rug with blues, greens and tans to finish off the space.
Can’t wait to finish that painting of the baseboards, put everything back together, and see where it stands. We’ll be doing the custom drapery rod next and I have been looking for some decorative tape to go on the edge of the drapery panels to give it a bit more personal feel. I’ll be sharing progress pictures of the master soon so we can see how it all looks freshly painted and put back together and live with it for just a bit to see what comes next!
Come find me on Pinterest // Facebook // Instagram // Twitter I would love to connect with you!


Leave a Reply